Getting Started and the Basics
- The device allows the user to download the software
- Please make certain that you are displaying the Qomo to your screen (tv, projector, etc.)
- Follow the instructions on the screen to download/install the software
Below are instructions for the first time user of the system. Please contact Ron Bradley with any questions, or submit a Remedy Ticket by emailing classtech@ncsu.edu.
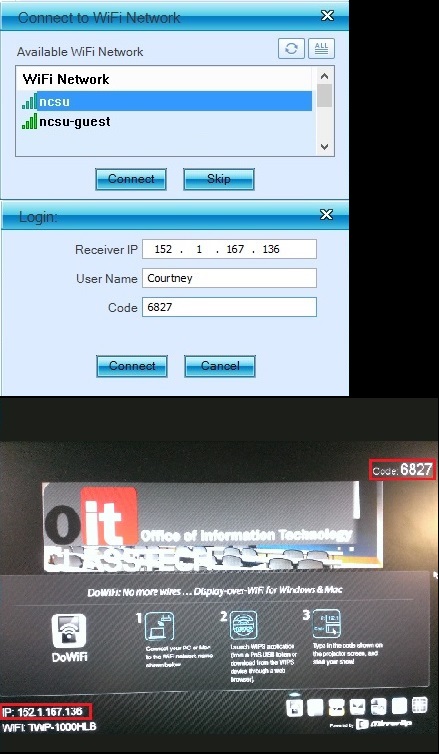
After turning on the display the Qomo is attached to, you should see a screen with the IP address of the device in the lower left handcorner. Type this address into the address bar of your browser.
If you do not see the WPS1000 splash screen, please verify that you have selected the proper input source on the display device.
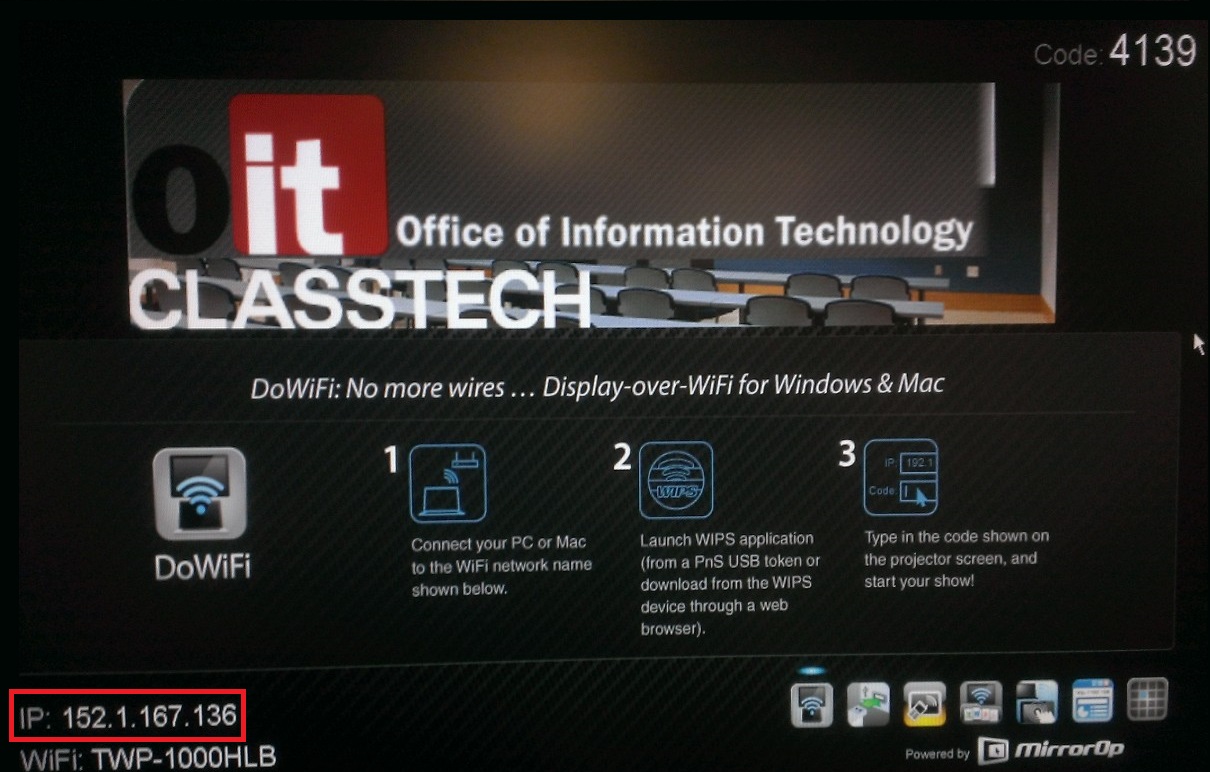
Click the “Download” link on the left. Then, click the “Download” button that corresponds with your operating system. Choose, “Save File” and note the folder you save to. Once the download is complete, run the file.
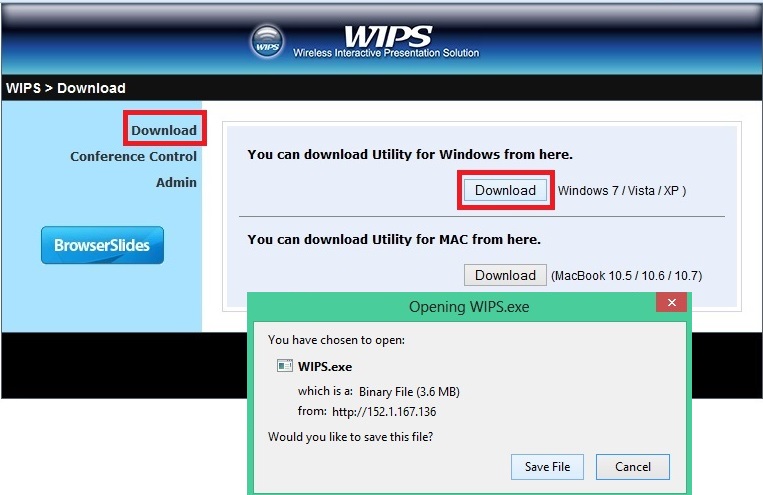
Running the file will bring you into the set up for the software. Accept the terms and allow the install to continue. You should then see a list of networks to connect to. If this window does not appear for you, check your task bar and see if there is a new program running. Choose the network you are already connected to (or are familiar with). You will then “Log in” using the IP address and code from the Qomo. The “name” you choose will be visible to other connected users.
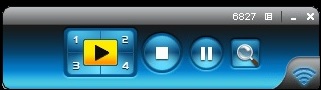
The four buttons around the play button will move your screen into the corresponding corner of the projected display. This allows multiple people to project simultaneously. Pressing the “play” button maximizes your screen. By pressing pause, you are able to freeze your projected screen and navigate your computer privately. The “stop” button will disconnect you from the Qomo.
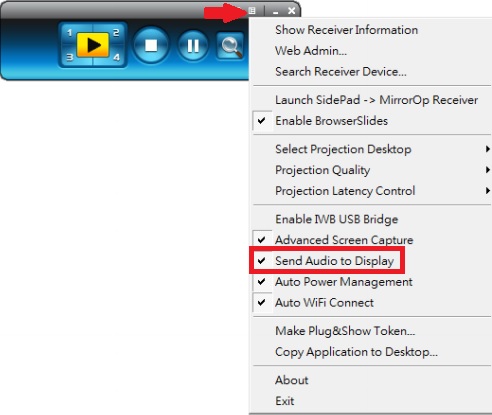
If you would like to stream audio, you will need to enable this in the menu. This will route the audio to the Qomo instead of your internal speakers. You can do this by entering the menu and enabling “Send Audio to Display.”
Getting Started with iPad
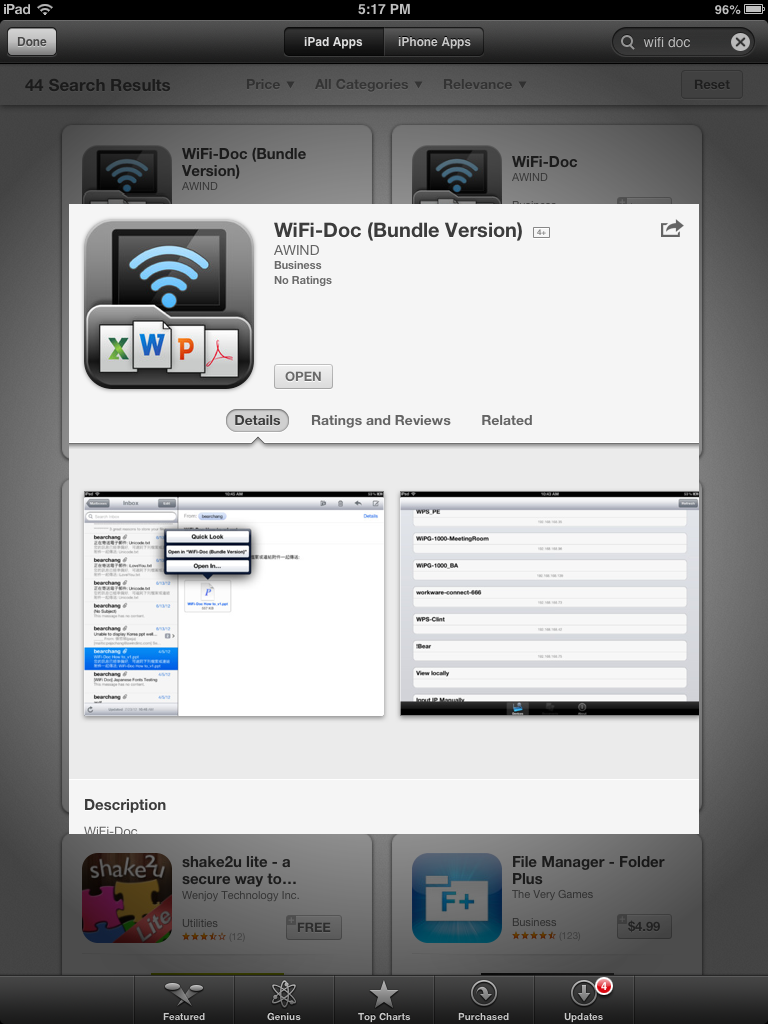
Go to the App Store and download “WiFi-Doc (Bundle Version)”
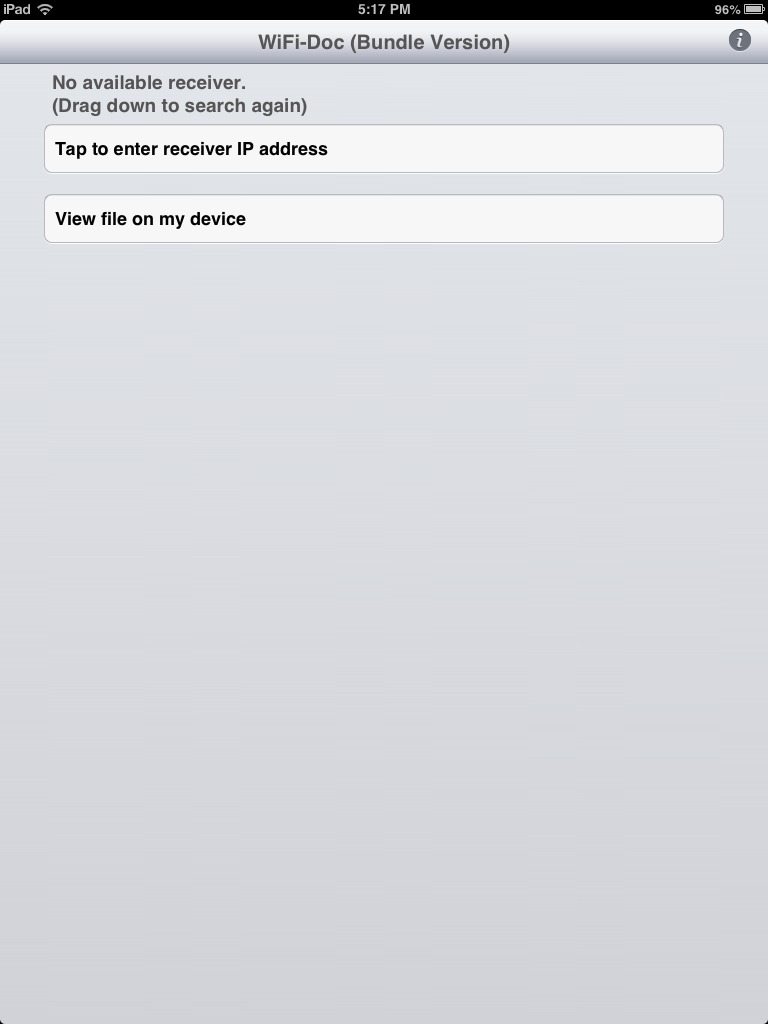
Open the App and “Tap to enter receiver IP address”. Then, enter the address displayed on the Qomo page.
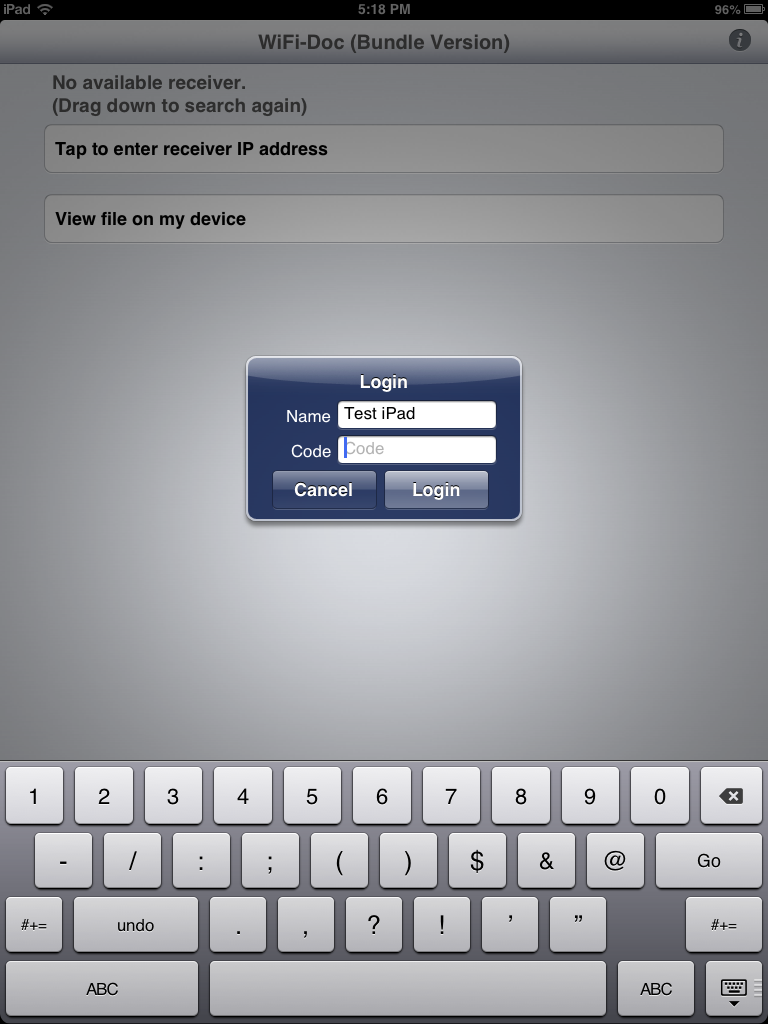
You will then need to chose a name that will be visible to other users and enter the “Code” that is displaying on the upper right side of the Qomo screen.
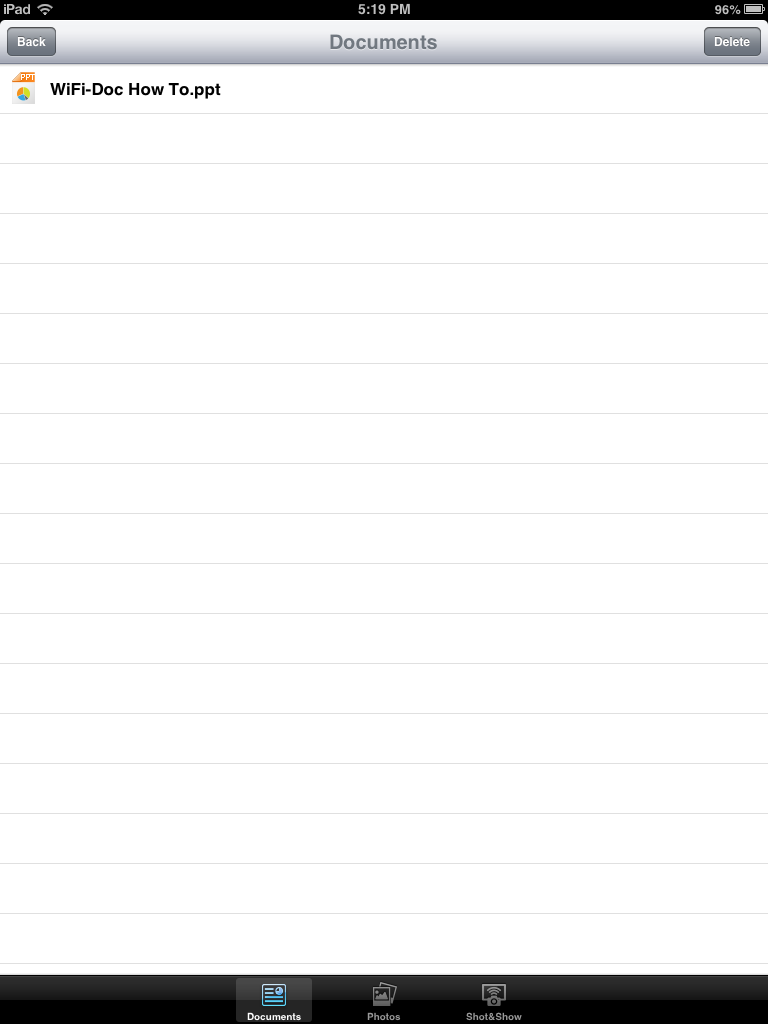
You are now able to display photos and documents via the Qomo. Move back and forth between photos and documents using the tabs at the bottom of your screen.
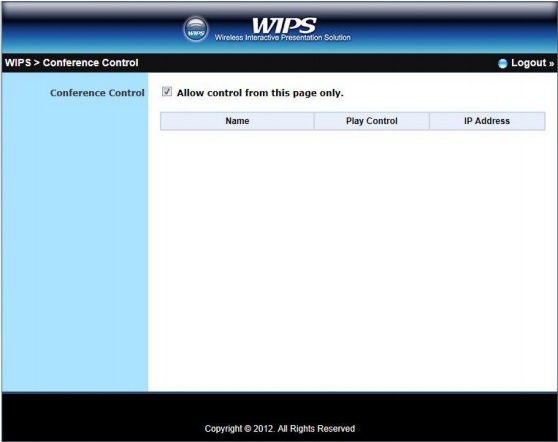
Acting as Moderator
You have the ability to act as a moderator when multiple people are connected. When you enable the moderator mode, you are the only one who chooses who displays and in what manner. Other users are not able to use the Qomo “toolbar” with the play and pause buttons. Only one user is able to be moderator at one time.
Access the web interface of the Qomo by typing the IP address into the address bar of your browser. If more than one person is connected, you will see a “Conference” button on the left. Clicking this prompts for a password. The default password is “moderator”. If the default password does not work, contact the person responsible for the unit in your department to see if it has been altered.
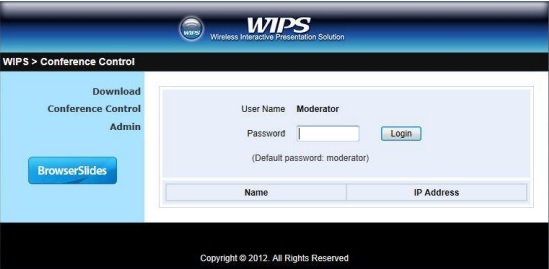
Once you enter the password, you are able to see everyone that is connected and if they are displaying. You can set which corner they display in by clicking the corresponding number. You can also kick them from the Qomo by clicking the “Stop” button. If you wish, you can re-allow users access via the Qomo “toolbar” by unchecking the “Allow Control from this page only” checkbox.