
Snapshot View of your Zone
*You can click any image to get a better view*
- After logging into ServiceNow:
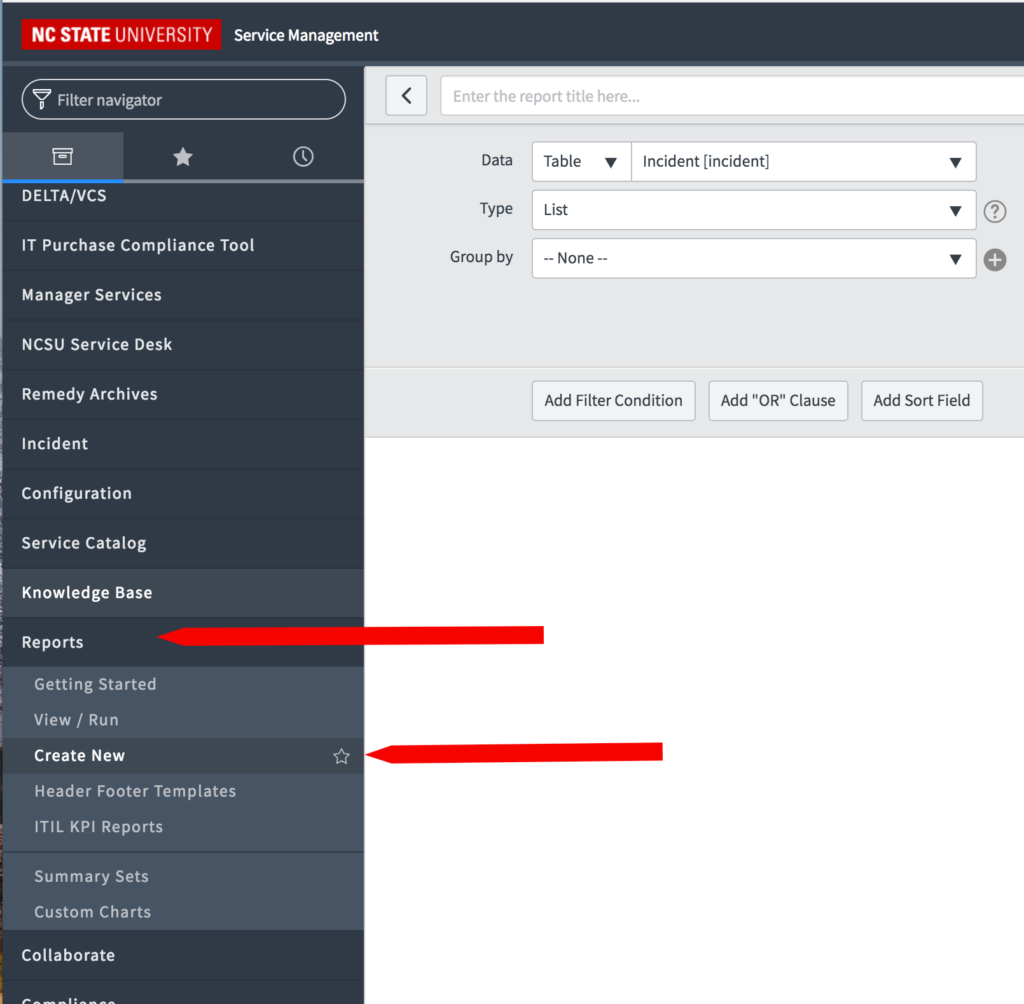
- Select Report –> Create New
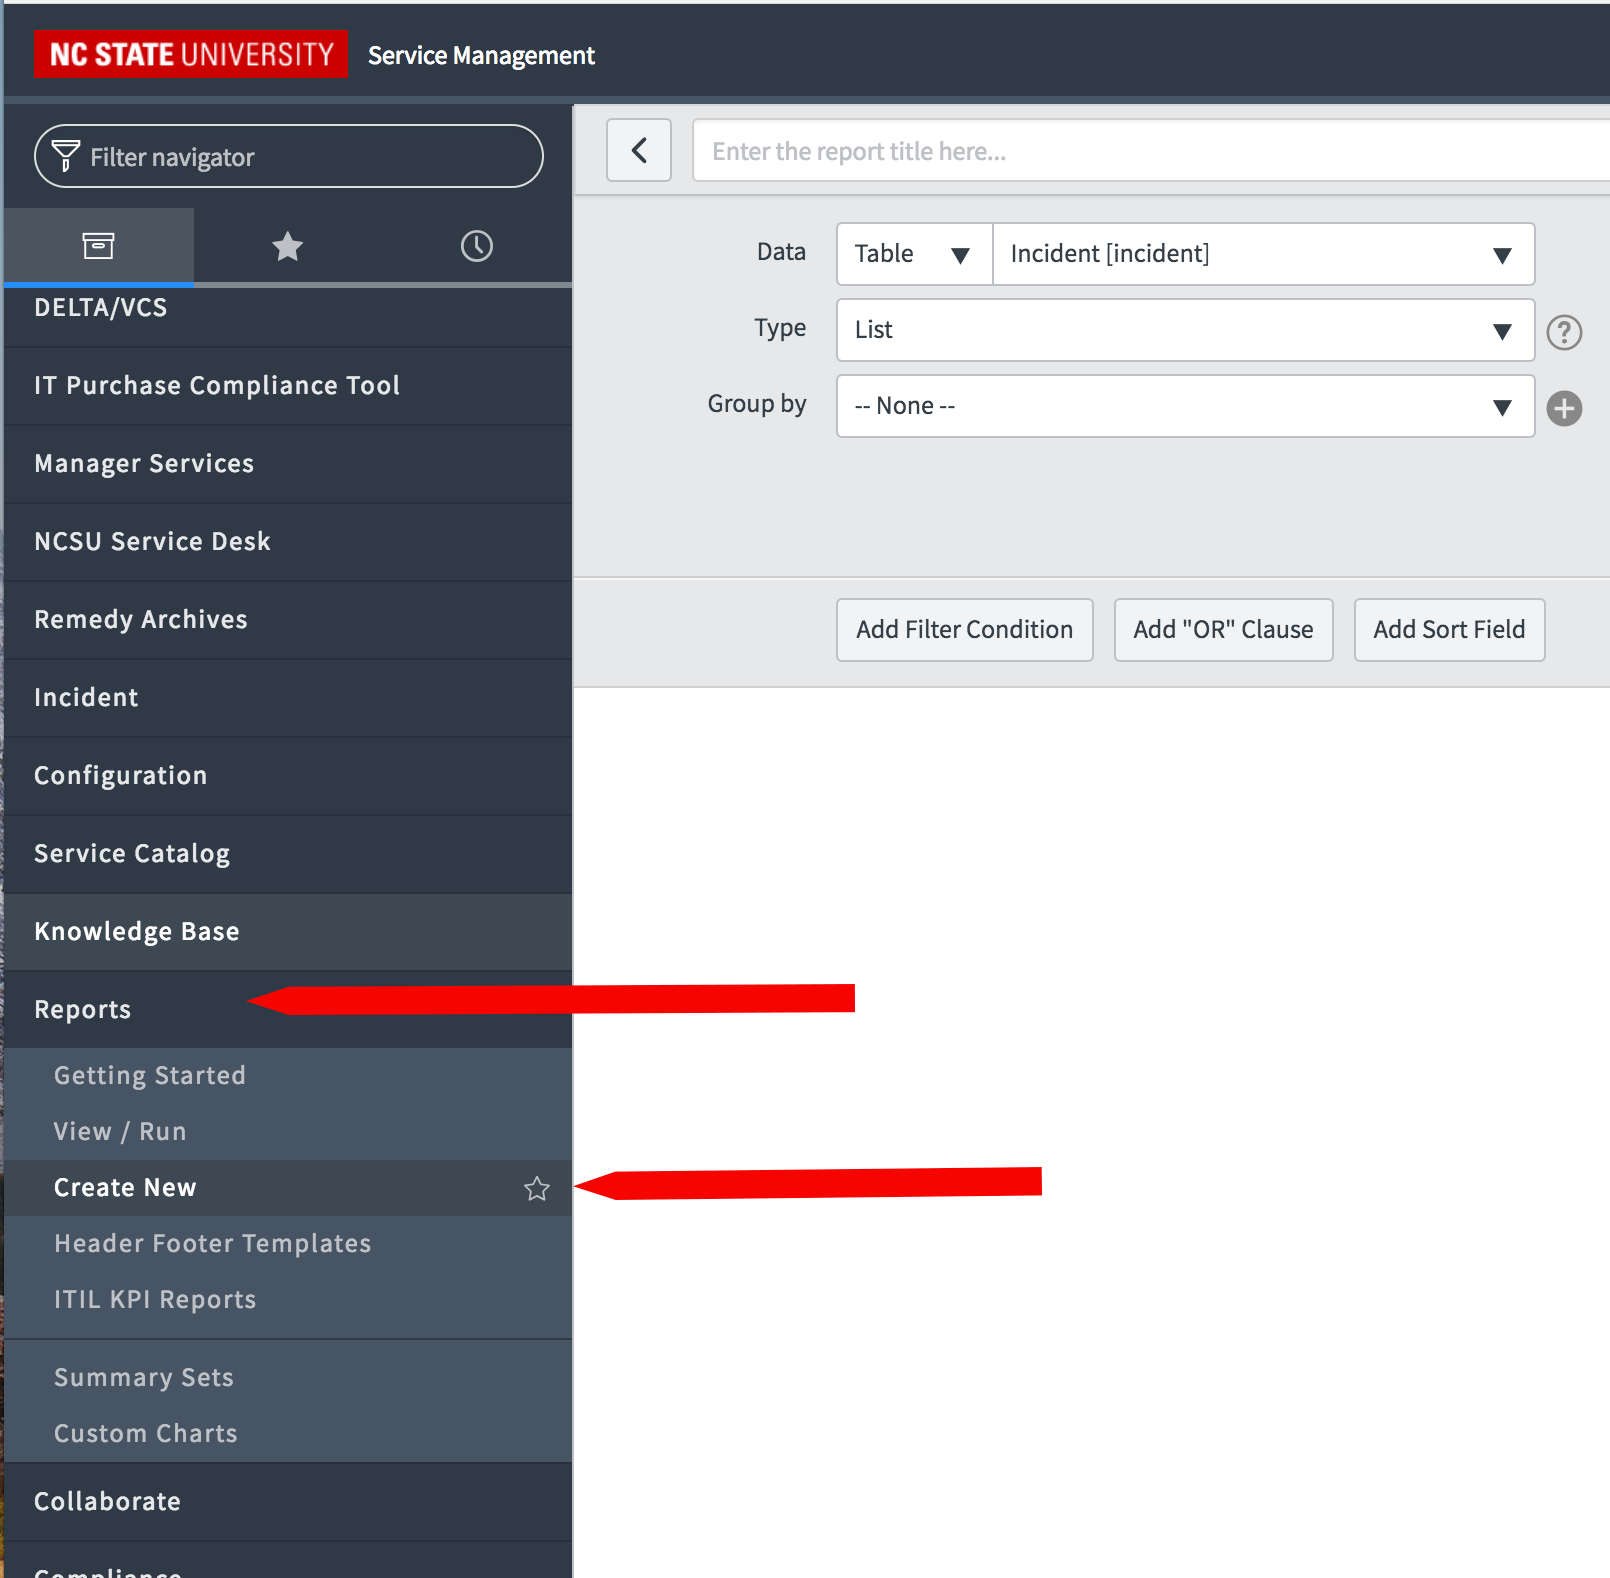
- Use the settings shown here
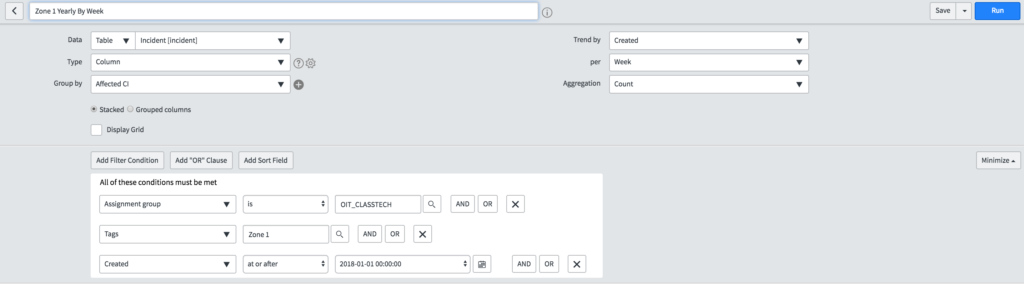
- Be sure to give your report a Name!
- Note: This report is for Zone 1 (Tags = Zone 1)

- Click Run in the top right of the screen
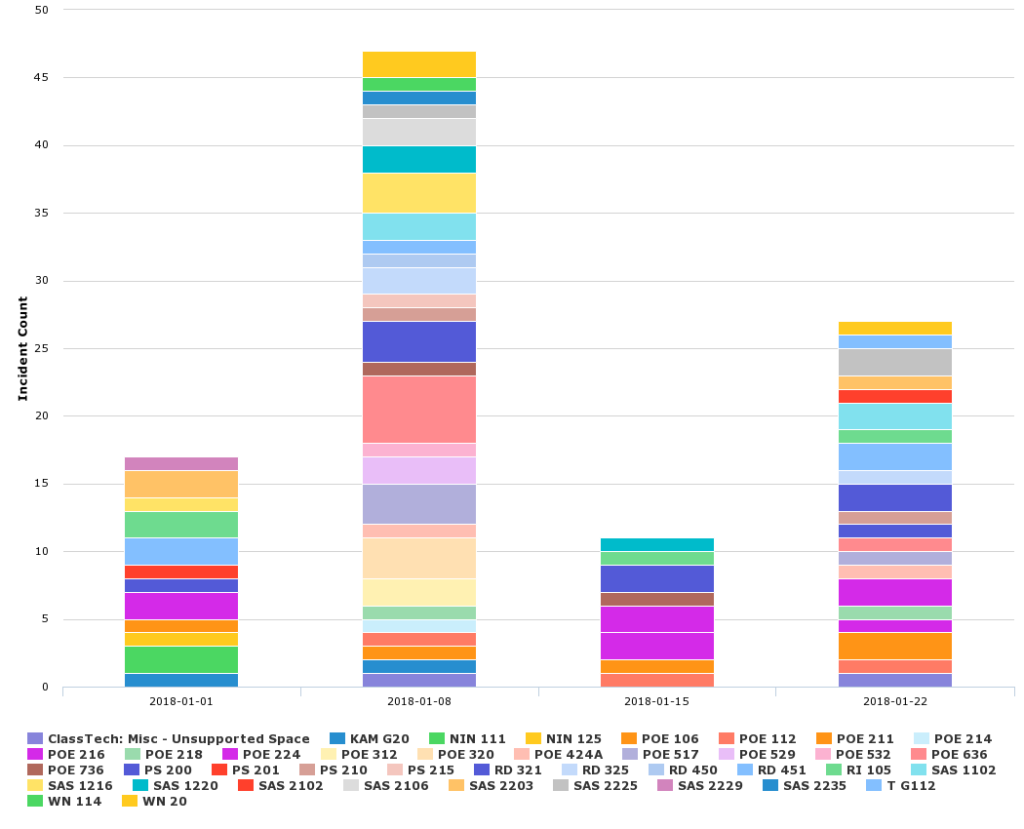
- Verify that you get a similar image as shown here
- If runs properly, and results are in-line (see image)
- Click Save in the top right

- To make adding your report to your Homepage simple

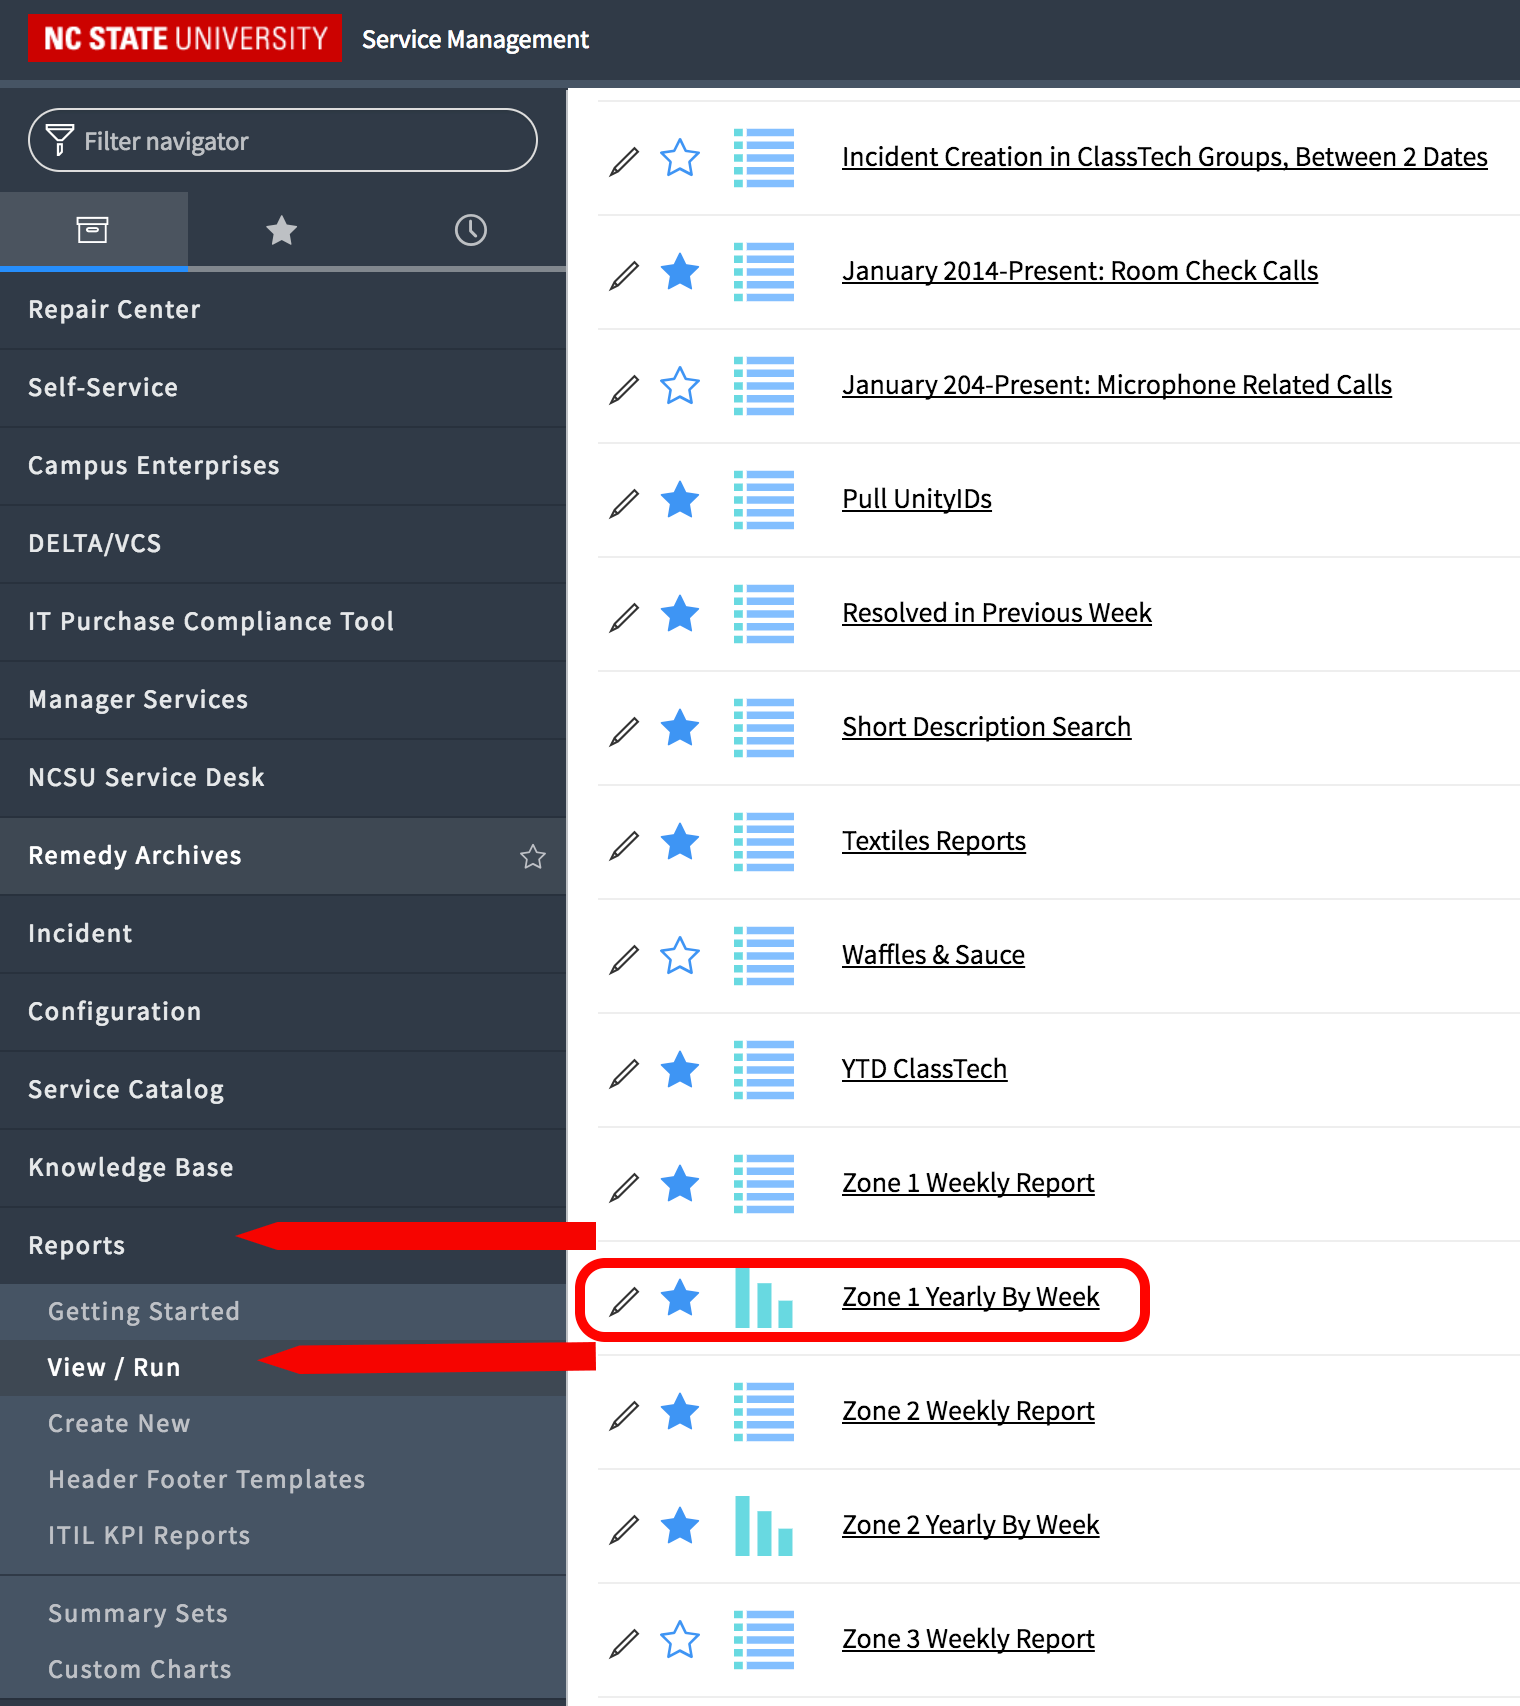
- Go back to your Report menu on the left
- Click View/Run
- Find your report by name, click the Star Icon
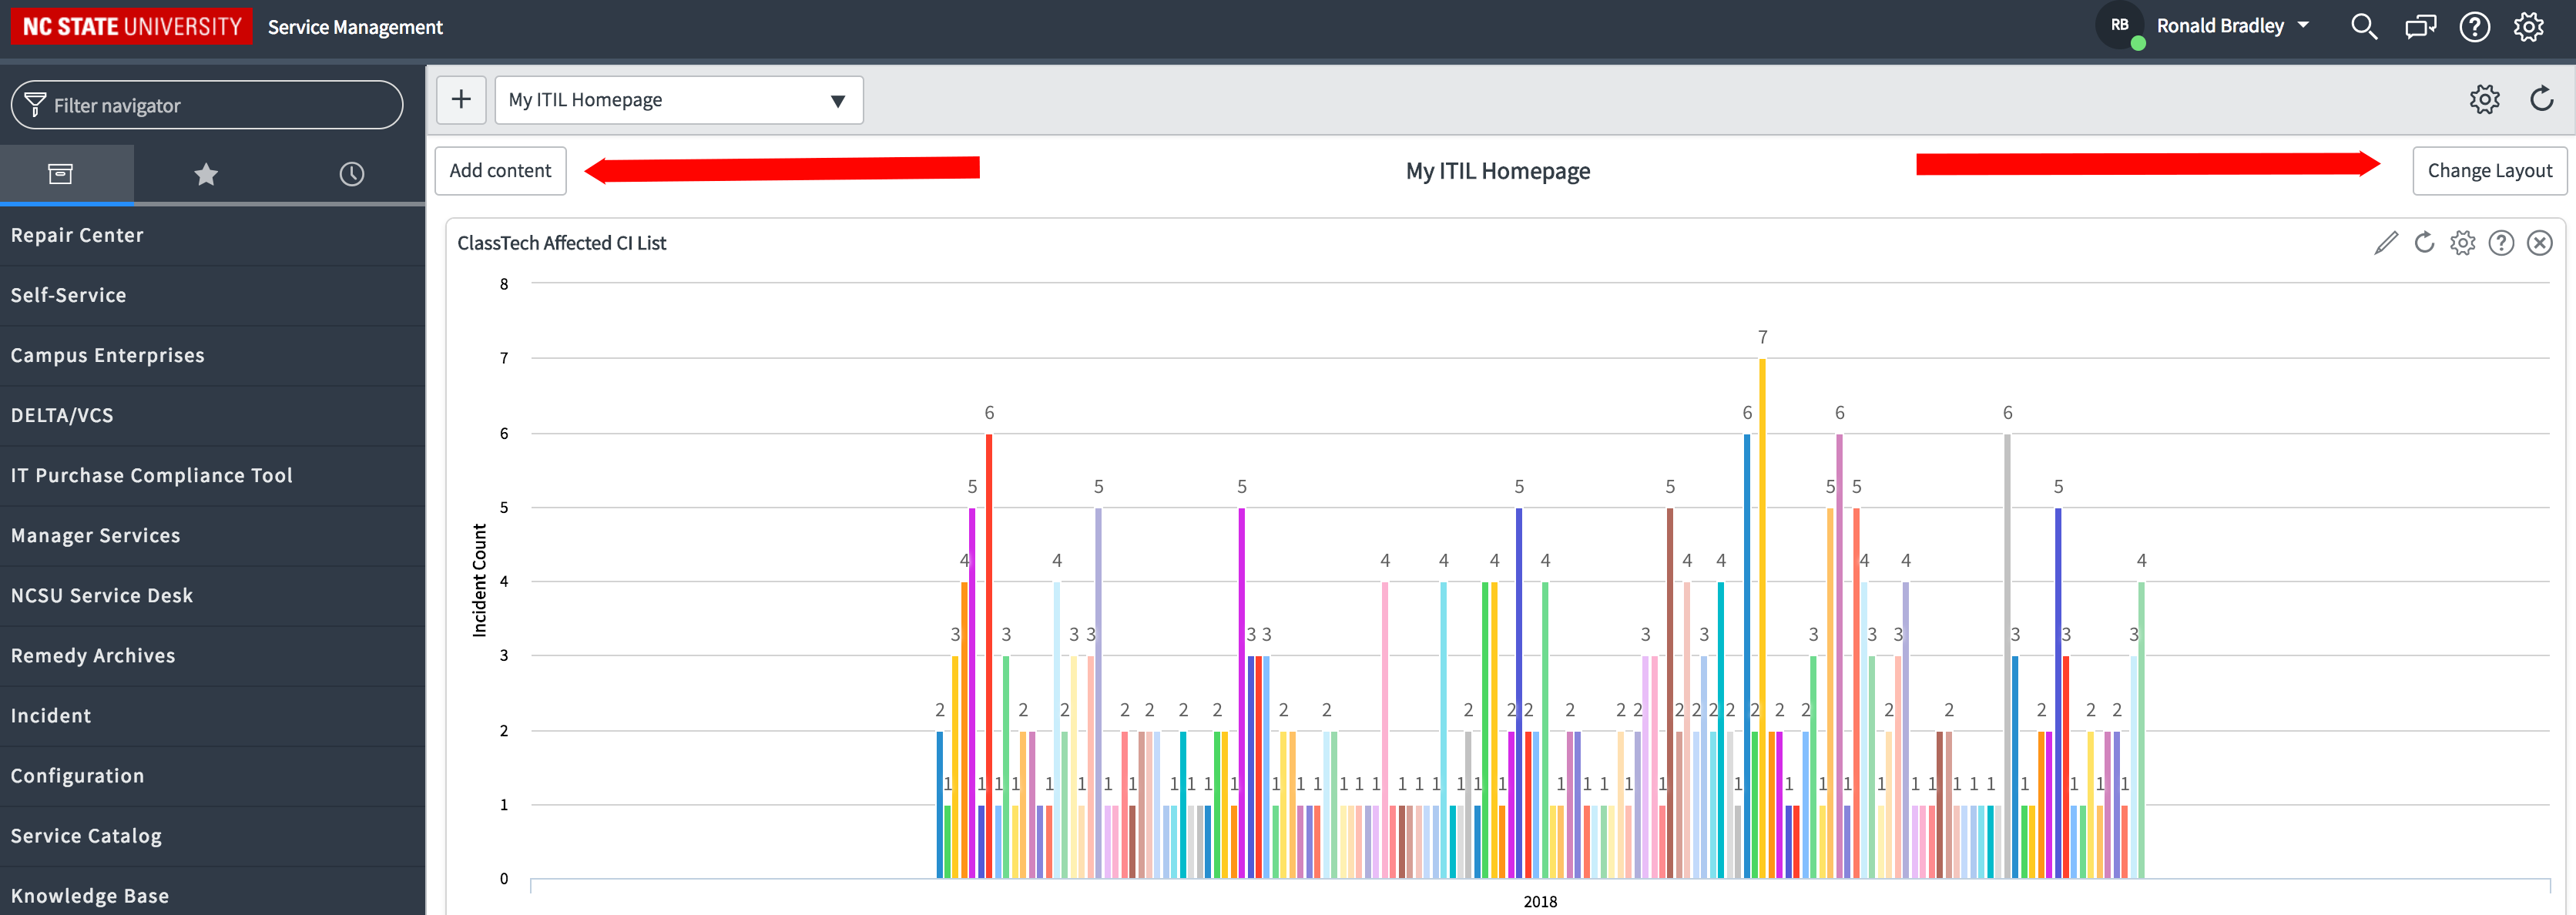
- To add your Report to the Homepage

- Go back to your Homepage (click NC State logo at top left)
- Click Add Content Button
- There is also the option to Change Layout
- I leave that to you to determine what you prefer for a layout
- In the pop-up Window
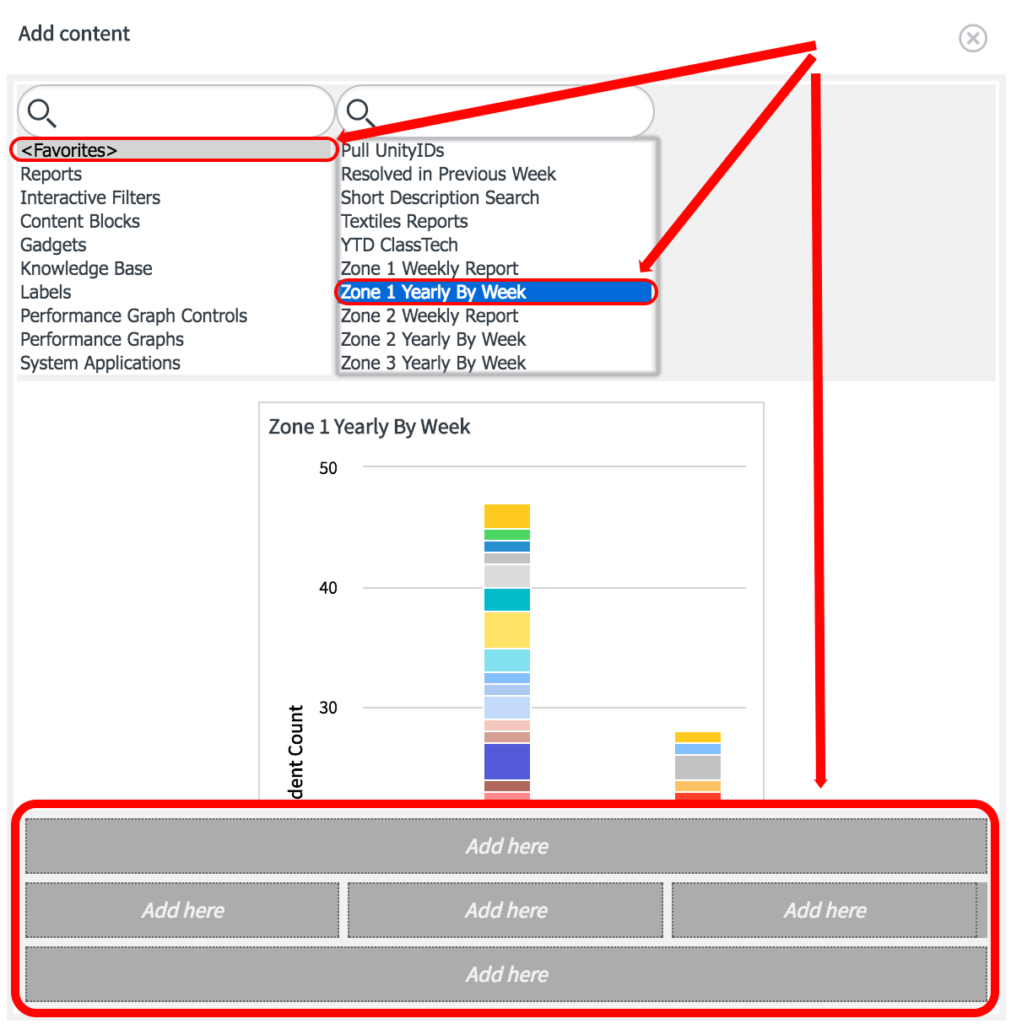
- On the left menu: click <Favorites>
- On the right menu: select the report you want to display
- The screen should refresh to display your report
- On bottom menu: select where on the Homepage you want your report to display

- Extra Credit
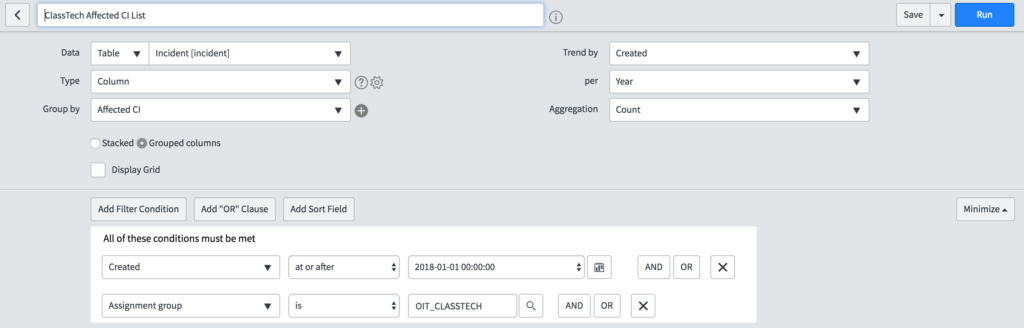
- If you want to display ALL Affected CIs as a Count
- Use this report
- Your report chart should be similar to the below image

